 |
| Gift bag |
 |
| side view |
How to make your own
- Cardstock 11 1/2" x 7 1/4" scored on long side @ 1/2", 4",5",6",9 1/2" & 10 1/2" turn cardstock and score short side @1" & 6"
- Fold all score lines. On the 2 side bits measure 1" up from the bottom score line with a grey lead then score from that mark to the corners to form triangles (this will be for the side gussets)
- The 1" fold along the long side is then folded down, its best to punch the holes for the handles now before assembling, but make sure they are in the same place on the front & back.
- Trim the bottom corner off along the 1/2" side this will form the tab.Cut up to score in line in 3 places, see image below for reference.
- Add sticky strip or a good strong tape along the 1/2" tab on the front side. Now construct your bag.
- For extra reinforcement I added a 3 1/14" x 1 7/8" bit of heavy cardstock inside the bottom of the bag, you can glue in place if you like.
- For the handles cut 2 bits of ribbon 35 cm long and tie off one end with a double knot, thread through the holes and tie off again.
 |
| bag template |
 |
| Pillow box die-perfect for holding single wrapped mars & cadbury chocolates. |
 |
| Candy wrapper die bon bon |
 |
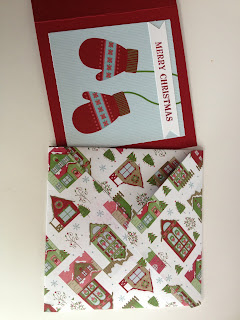
| Mini cards 3 1/2" x 3 1/2"- works really well with the images from the dsp |
 |
| Matching envelopes to go with the cards |


Hi Rachael, I love how you have done these projects, especially the carry bag made from a 12 x 12 page; I made one longer, to fit the pack of sponges which is one of the prizes for our retreat on 7th. thank you also for the envelop sizes they will come in handy very soon. By the way, the other projects on this post are great as well, you are very talented, thank you for sharing.
ReplyDelete