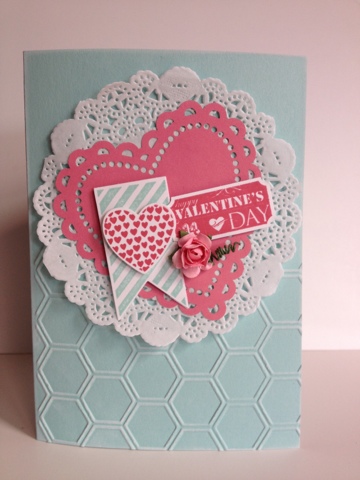
Last Thursday I saw this really nice card on Pinterest using the Oh, Hello stamp set & I just had to Case it.
The original card was made by juliedavidson.blogspot.com
Monday, April 1, 2013
Fun with pop up posies kit
Today I have been having a play with my pop up posies kit from Stampin' Up's new mini catalogue( pg 18) & I just love how easy it is to create beautiful projects in minutes. Here are 2 cards I whipped up for a couple of special gals & a favour box we made in class last week. TFL :)
Friday, March 22, 2013
Join Stampin' Up! and get 25% more for free
This offer has been extended till the end of march 2013!!
After today the kit remains the same price but you wont get the 25% extra bonus.For more info click here, feel free to contact me if you need more info to join up. Other wise you can join up instantly by clicking the link on the top right hand side of my blog that says join now and follow the instructions.
Monday, March 18, 2013
February Class Projects
Ok so it's halfway into march & I realise that I haven't gotten around to posting our class projects from February ( send me to the naughty corner!!) so here they are finally, we made 3 cards & a mini Kraft box with a crepe paper flower.
I love how super easy it was to make beautiful flowers with the new crepe paper. Simply fold one of the rectangle pieces of crepe paper in half long ways then fold in half again bringing the short ends together then repeating one more time. You end up with 8 layers then simply punch out with the blossom punch, scrunch petals then add a brad to hold it all together.
To make the mini Kraft box you need a 8 1/2" x 4" Kraft cardstock, score @ 2", 4", 6" & 8" turn & score @ 1" & 3".
Fold & Cut up along the score marks on all 4 score marks on each side of the box to the 1" mark. Stamp and assemble your box, fill with goodies and add flower to finish it off! Super simple.
I love how super easy it was to make beautiful flowers with the new crepe paper. Simply fold one of the rectangle pieces of crepe paper in half long ways then fold in half again bringing the short ends together then repeating one more time. You end up with 8 layers then simply punch out with the blossom punch, scrunch petals then add a brad to hold it all together.
To make the mini Kraft box you need a 8 1/2" x 4" Kraft cardstock, score @ 2", 4", 6" & 8" turn & score @ 1" & 3".
Fold & Cut up along the score marks on all 4 score marks on each side of the box to the 1" mark. Stamp and assemble your box, fill with goodies and add flower to finish it off! Super simple.
![]() |
| card 1-made using vintage verses stamp set from sale-a-bration,the hearts a flutter bundle,honeycomb embossing folder, that's the ticket stamp set & new paper doilies all from the new mini catty, |
![]() |
| card 2-blackboard technique |
![]() |
| card 3 -made using patterned occasions stamp set & Sycamore street ribbon & button pack from sale-a-bration |
Wednesday, February 13, 2013
A Valentine's card or two
Here are a couple of cards I made using lots of new cool products from the latest mini catalogue, if u haven't had a chance to check it yet there's a link on the right hand side of my blog.
Supplies Used:
•honeycomb embossing folder
•paper doilies
•hearts a flutter bundle ( stamps & dies)
•more amore specialty designer series paper (the heart it's laser cut, not a die:( but wouldn't be awesome if it were a die!!)
•that's the ticket stamp set & fabulous phrases stamp set
•ticket duo punch
•pool party card stock
•ink-pool party, primrose petals, white for sponging.
•raspberry ripple stitched satin ribbon
•paper rose (non SU
•dimensionals
Thanks for popping by, have a great day :)
Supplies Used:
•honeycomb embossing folder
•paper doilies
•hearts a flutter bundle ( stamps & dies)
•more amore specialty designer series paper (the heart it's laser cut, not a die:( but wouldn't be awesome if it were a die!!)
•that's the ticket stamp set & fabulous phrases stamp set
•ticket duo punch
•pool party card stock
•ink-pool party, primrose petals, white for sponging.
•raspberry ripple stitched satin ribbon
•paper rose (non SU
•dimensionals
Thanks for popping by, have a great day :)
Saturday, November 24, 2012
Christmas Class projects
| card cased from catalogue |
| Click here to watch a video on how to make this amazing pop up tree |
| front of my pop up tree card |
| pull up gift card holder-cased from here |
Christmas Gift's with snow festival designer paper
| Gift bag |
| side view |
How to make your own
- Cardstock 11 1/2" x 7 1/4" scored on long side @ 1/2", 4",5",6",9 1/2" & 10 1/2" turn cardstock and score short side @1" & 6"
- Fold all score lines. On the 2 side bits measure 1" up from the bottom score line with a grey lead then score from that mark to the corners to form triangles (this will be for the side gussets)
- The 1" fold along the long side is then folded down, its best to punch the holes for the handles now before assembling, but make sure they are in the same place on the front & back.
- Trim the bottom corner off along the 1/2" side this will form the tab.Cut up to score in line in 3 places, see image below for reference.
- Add sticky strip or a good strong tape along the 1/2" tab on the front side. Now construct your bag.
- For extra reinforcement I added a 3 1/14" x 1 7/8" bit of heavy cardstock inside the bottom of the bag, you can glue in place if you like.
- For the handles cut 2 bits of ribbon 35 cm long and tie off one end with a double knot, thread through the holes and tie off again.
| bag template |
| Pillow box die-perfect for holding single wrapped mars & cadbury chocolates. |
| Candy wrapper die bon bon |
| Mini cards 3 1/2" x 3 1/2"- works really well with the images from the dsp |
| Matching envelopes to go with the cards |
Subscribe to:
Posts (Atom)